
How to Tape Your Breasts for a Plunging Neckline or Deep V
How to Tape Your Breasts for a Plunging Neckline or Deep V
If you’ve ever bought a beautiful dress with a plunging neckline for a special event, only to realize that a traditional bra isn’t going to achieve the look you’re going for - we’ve been there. Luckily, if you’re looking to lift & shape your breasts without any visible straps, our nipple tape bra is an excellent solution. But, while this technique had gotten more attention in recent years, it can still be confusing & frustrating if you’ve never done it before, or had help previously.
If that sounds like you, don’t sweat it, we’re here to help. Read on to learn about how you can use tape quickly and easily to make you look amazing in that dress!
To begin, we need to figure out what kind of tape you’ll be using:
Breast Support Solution #1: Skip the Tape Altogether
This may seem like a strange suggestion to include in a post about how to use tape, but bear with us - we believe there’s a better solution.
Taping your breasts requires measuring and trimming that can be difficult to master and time consuming to apply. This can be especially frustrating when you don’t have the luxury of extra time to get ready.
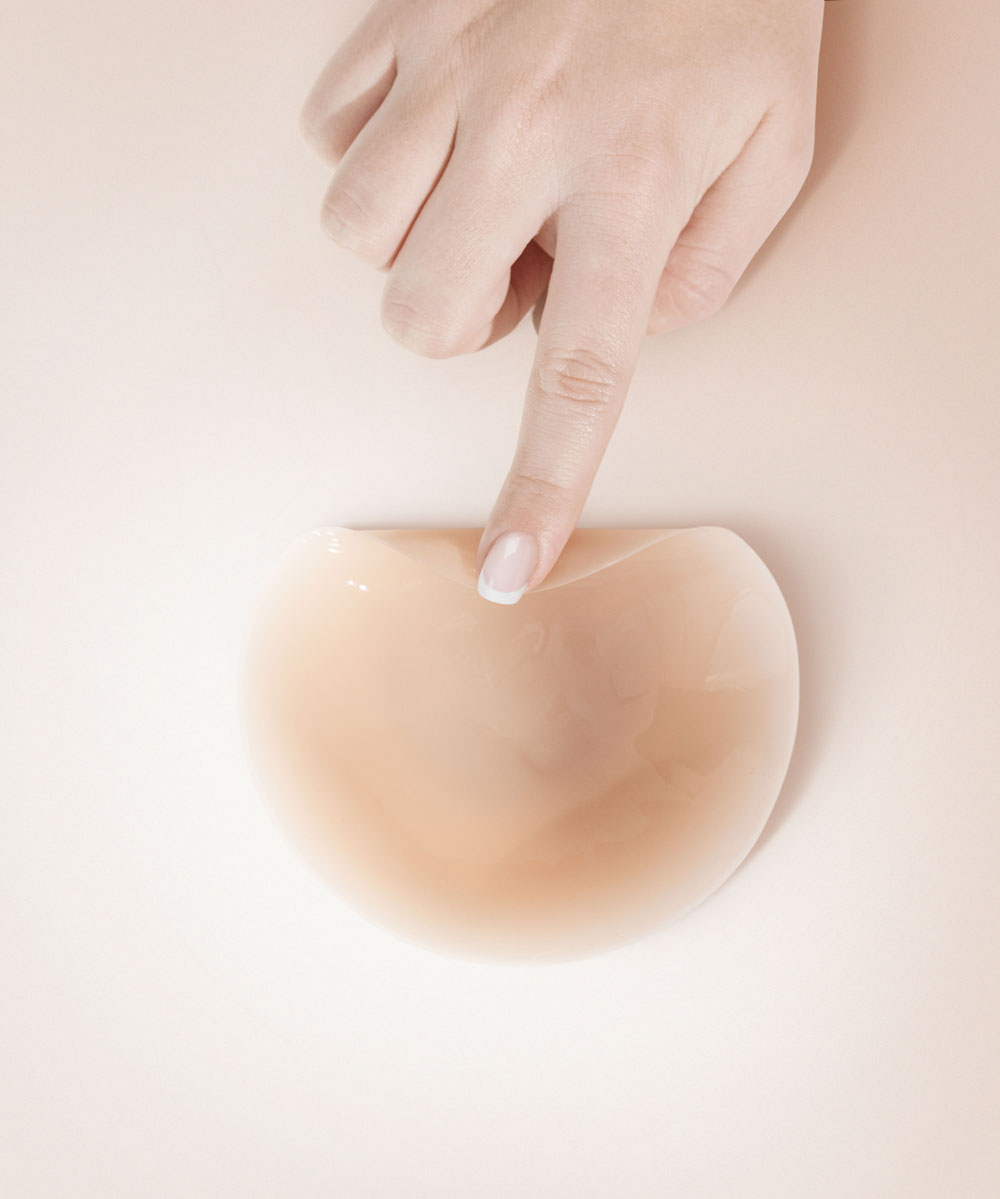
That’s why we designed the Game Changer - an adhesive bra that solves all of the same problems as tape, offering lift without straps, wings or bands. It’s designed by women, for women, supports sizes up to DDD/G/H, and is far easier to apply than tape.

Breast Support Solution #2: Boob Tape
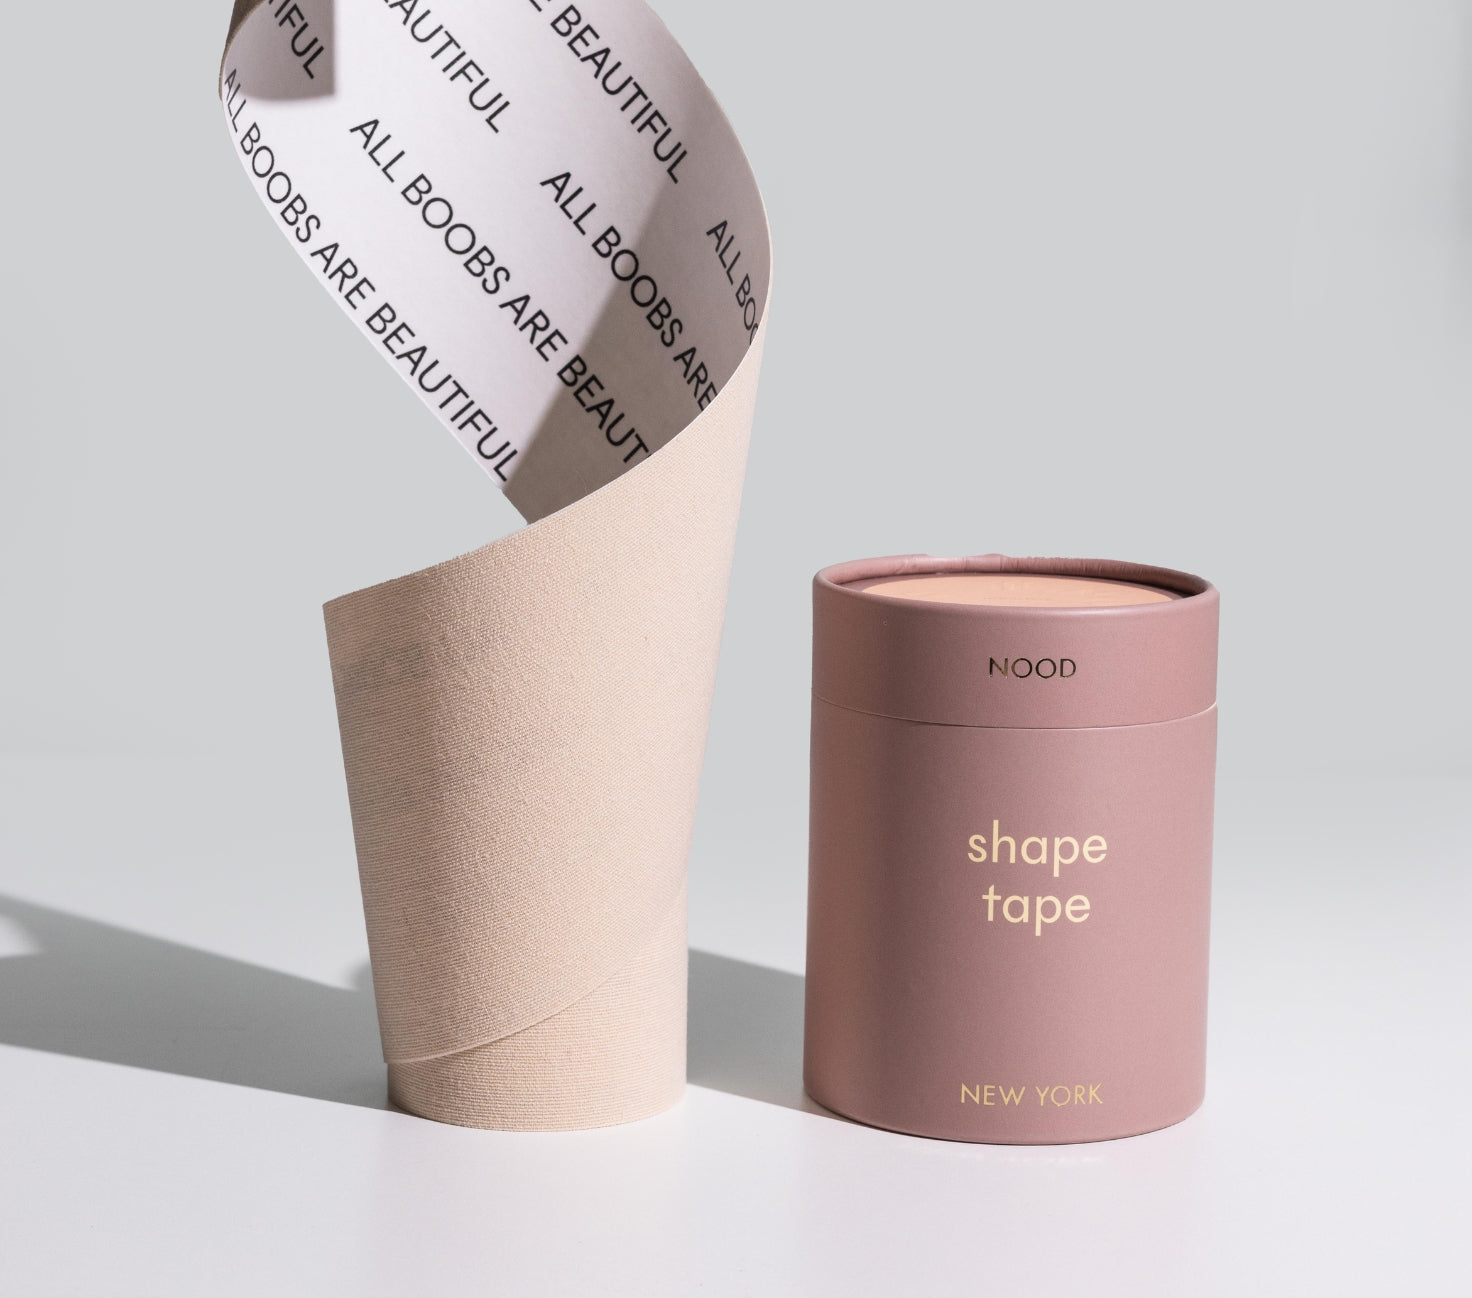
If you have some time to spare before the event you want to wear the dress to, and are looking for both looks and comfort, it’s worth investing in some proper boob tape, like the Shape Tape we’ve developed here at Nood.
Specifically designed to shape & lift while also being comfortable, breathable, and non-irritating, it’s a better solution than DIY options. Moreover, you can use boob tape to achieve a variety of different styles, including halter necklines, plunge necklines, open-side garments, wide necklines, backless, asymmetric necklines, low-backed garments, or strapless necklines.
Importantly, boob tape will not damage your skin and the removal process is simple and pain-free. Best of all, it works for any cup size, and will last all day - or evening.
Breast Support Solution #3: Gaffer Tape
Made more popular after the recommendation of Kim Kardashian, gaffer tape is a solid option when you are in a pinch. Made of vinyl-coated cloth, this tape is very strong and will definitely keep your breasts in place.
That said, gaffer tape can restrict your movement and is not a breathable material. Because it wasn’t developed for use on skin, you may find you have to deal with a fair bit of irritation when you remove it.
Breast Support Solution #4: Sports or Athletic Tape
If you are looking for a gentler, more sweat-resistant option, sports tape is a good choice. Made of cotton, sports tape was specifically developed for use on the skin and in turn, won’t irritate it.
Sports tape also moves as you move so it can stretch, and in turn, looks natural under your clothes. It’s also breathable and does not crinkle or make noise. That said, sports tape is not as strong as gaffer tape or proper boob tape, so keep that in mind.
Breast Support Solution #5: Double-sided Apparel Tape
Double-sided apparel tape definitely is a great option for those times when you can't button the top button on your shirt. But, besides solving that pesky wardrobe problem, double-sided apparel tape can also help you get the look you want, as long as you’re alright with a bit of restricted movement.
How to Tape Your Breasts
While taping your breasts may seem daunting at first, with a little practice, you will quickly become an expert. There are just a few simple steps involved:
Complete a Skin Patch Test
Before going all out and taping your breasts, it is a good idea to do a small patch test on your skin to see if the tape will irritate your skin. This is especially important if you’re considering using alternative tape options.
To do this, cut off a small piece of tape and place it on your skin. The inside of your arm is a great place to try as the skin is likely similar to your breasts, and fewer hairs mean it will hurt less when you remove it. Remember to keep the tape on for a few hours and then take it off to see if there is any irritation.
Prep Your Skin
If your tape has passed the skin patch test and you’re ready to start, the final prep step is to clean the surface of your skin before applying the tape, as the adhesive may not stick to oily skin.
For the same reason, make sure that you do not put lotion, oily ointments, or powders on your skin. Rubbing alcohol can also help to remove oil from your skin surface. Also, it’s important to note that you should never want to apply tape on a damaged, sunburned, or broken skin surface.
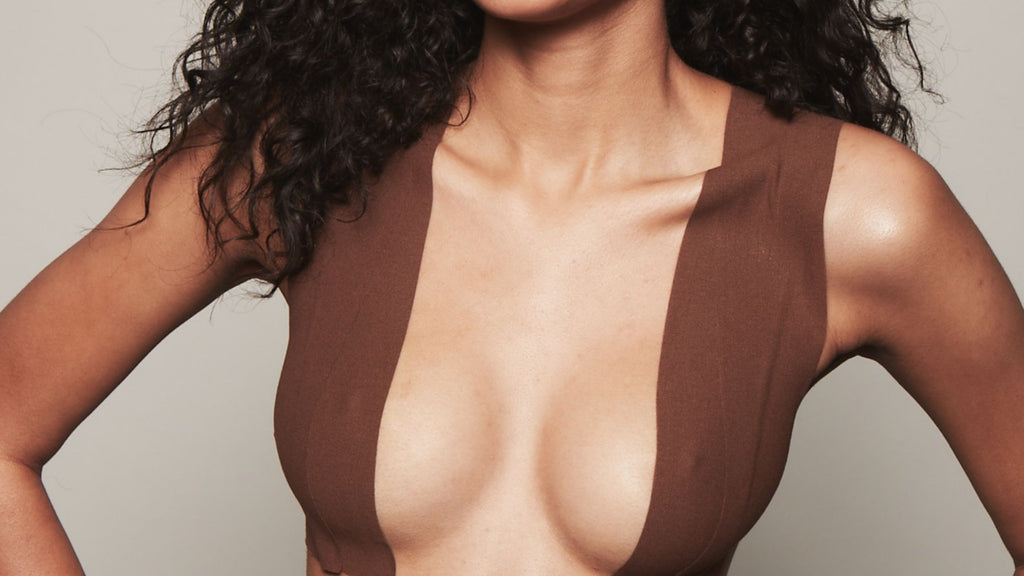
Taping Your Breasts for a Plunging Neckline
Step 1. Cut a piece of tape about 13 inches long or measure the length from the back of your shoulder to the bottom of your breast. Gently lift your breast up and place the end of the tape on the outside of your breasts. Then press the tape down firmly towards the end of your shoulder. Make sure the tape is secure by pressing it down with your hand.
Step 2. Do this process again with two other pieces of tape. Make sure you move inwards towards your inner breast with each piece of tape and sculpt as you tape to make it look perfect.
Remember to be careful around your neckline as you may not want other people to see the tape at your special event. Make sure you cover your nipple with a nipple cover or cotton pad/gauze before you tape it up.
Pro Tip: You can pick up both our Shape Tape, Game Changer Lift & Shape Bra, and No-Show Reusable Nipple Covers in one convenient package with our Pro Stylist Kit.
Step 3. Complete the same process on the other side of your body. It’s okay if the end result doesn’t look exactly identical, after all - our bodies aren’t perfectly symmetrical to begin with!

How to Remove the Tape
Without a doubt, tape removal from the skin can be an unpleasant experience.
However, there are a number of methods to make this process easier and painless. The most common methods are to work your favorite oil or moisturizer under the tape to start to loosen the adhesive, or take a hot bath with the tape still on in order to loosen it.
Either way, one the tape’s adhesive has weakened, start to slowly peel it off. If your skin has adhesive residue from the tape left on it, you can use put some baby oil on a cotton pad and gently rub it off.
Finally, once the tape and any residue are completely removed, it’s best to moisturize your skin so it can recover well.

Do Not Make These Breast Taping Mistakes
Although breast taping can seem like a relatively simple process, in order to remain safe and avoid potential discomfort, you should watch out for the following:
Mistake #1: Taping Too Tightly
While you definitely want the tape to hold your breasts in the right position, you also do not want to restrict your blood flow or make you uncomfortable.
Remember that if the tape is too tight, it’s possible to cause injury. Similarly, you should never place the tape all around your body this could restrict your breathing.
Mistake #3: Taping Too Loosely
While you don’t want your tape to be too tight for health and comfort reasons, you also don’t want the tape to be too loose. After all, if the tape is too loose, if won’t provide the support needed to achieve a great look, and may not stay in place either!
Mistake #4: Not Taking Hot Temperatures Into Account
If you use a high-quality boob tape, you don’t need to worry about hot temperatures as the material is sweat-resistant, comfortable, and will always stay in place.
However, if you opt for one of the “in-a-pinch” methods mentioned above, such as gaffer tape, there is a good chance that you will be very uncomfortable in situations where the temperature is on the hot side. This will cause you to sweat, and sweat can affect the adhesive on your gaffer tape and cause it to loosen.
Practice Your Taping Technique
Like everything new we try in life, “practice makes perfect”. So, if you have a beautiful dress to wear for an event in the near future, it is always better to practice your boob taping skills before the event.
The first time you try taping your own breasts, you may not achieve the right shape and lift you’re looking for, and no one needs the added stress of learning how to apply boob tape on your special night! After a few tries, you’ll get the hang of it.


